Finishing the kayak involved lots of small things: I installed bolts for attaching the foot braces, added deck stringers, extended the forward-most deck beam a little wider to move the mast further aft (on Brian’s advice). Then a coating of oil was wiped on the frame and allowed to dry before sewing on the skin.
I have to admit I’m glad this is actually my second skin-on-frame boat, and I’ve had some experience sewing. The only small mistake I made was that I forgot to veer around the block for the mast on the forward-most deck beam. Luckily I cut it with plenty of slack here and I was able to veer a teensy bit. I think this will allow me to mount the mast step on the block. Dying with the acid dye was fun, and I’m very happy with how it turned out. A steam iron is used to tighten the nylon skin after sewing and dying. This really works well, and even took out the slack around the cockpit coaming (except for one or two small wrinkles). My only words of advice: go easy on the heat gun when getting bubbles out. I used thickened (partially-cured) coating to fill needle holes in the stitching and I got spent too much time on this and didn’t notice that the coating turned a little milky and thick. Not too ugly, but something to watch out for in my next kayak. Yup! My wife said she might like one, too, and the Cape Falcon Kayak license allows you to build two from the same set of plans. Then we can catamaran them together… can’t wait!
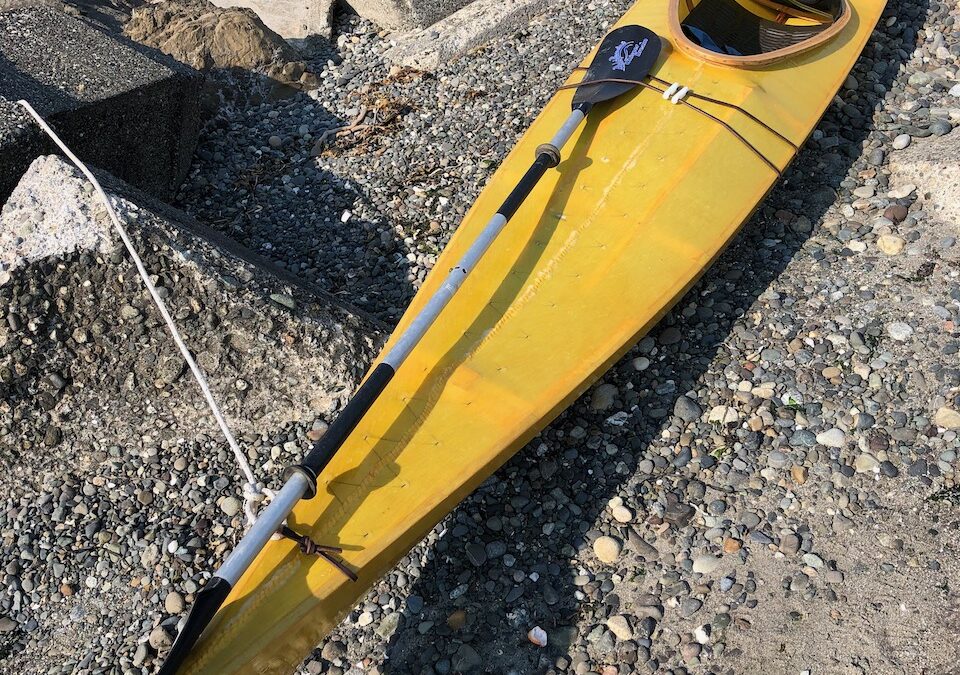
I love yellow. She’s called Sunflower. Off to the San Juans!
 Steerable foot braces are installed.


 Deck stringers are added to the frame.
 The #1 deck beam needed an extension epoxied on to bring it a bit further aft for the sailing rig later.
 The finished frame is coating in oil and allowed to dry.
 The skin is sewn at the bow and stern first.
 A long center seam runs along the deck.


 The cockpit coaming is sewn in. The wrinkles disappear after the skin is ironed.
 Yep: lemon yellow acid dye!
 After the dye the boat is coated in a poly-urethane.
 All done!